You can do some very clever things now Google have introduced their V3 API for Maps. James has already covered some basic setup techniques in a previous blog post, but recently we had the need to insert a lot, and I mean hundreds, of markers onto a single Google Map. This posed a frustrating problem…
The Javascript involved in creating a Map via Google’s API can be messy at the best of times, so trying to crowbar multiple markers in via Javascript was starting to get silly. For example, the cleanest way to insert multiple markers via Javascript is something like this:
// Standard Map Setup Script...
// map = new google.maps.Map(...

// Create our markers....
var markers = [
      ['First Marker', 51.5560928, -0.1053014, 4],
      ['Second Marker', 52.5087462, -1.8854229, 5],
      ['Third Marker', 51.4725065, -3.2047995, 3],
      ['Fourth Marker', 51.4807263, -0.1906128, 2],
      ['Fifth Marker', 51.3977037, -0.0854231, 1]
    ];


for (i = 0; i < locations.length; i++) {
      marker = new google.maps.Marker({
        position: new google.maps.LatLng(locations[i][1], locations[i][2]),
        map: map
      });
}
This is fine when we’re dealing with a small number of markers, but imagine managing this code with 800 markers listed in the markers object, it would be incredibly impractical.
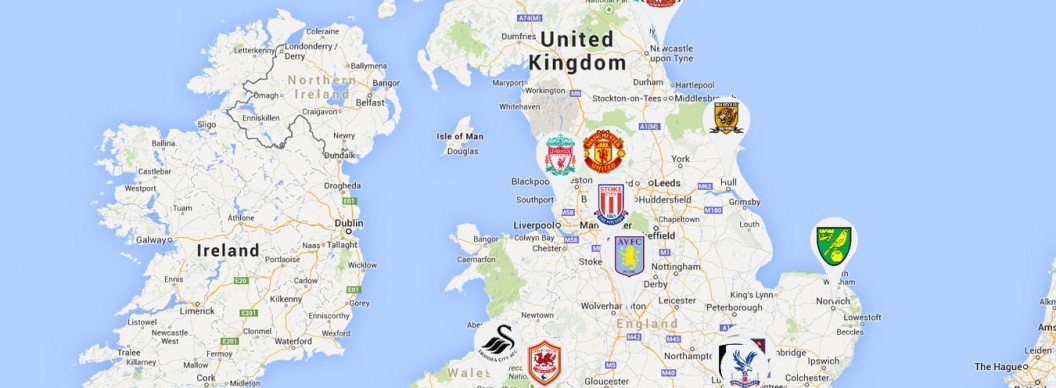
This is where XML comes in. By loading Google Map Markers via XML, we can import large amounts of markers while keeping our Javascript (fairly) simple and clean. Below, I’ll outline the code involved in doing this, while presuming you’re familiar with the normal Map setup script. You can see a full working example via the link at the bottom of this post.
So, lets get into it. I’ve set this up using 3 files; the first, index.html, contains all of the normal HTML associated with the page and then the javascript we need to initialise the map;
	function initialise() {
		myLatlng = new google.maps.LatLng(54.559323,-3.321304);
		mapOptions = {
			zoom: 5,
			center: myLatlng,
			mapTypeId: google.maps.MapTypeId.ROADMAP,
		}
		geocoder = new google.maps.Geocoder();
		infoWindow = new google.maps.InfoWindow;
		map = new google.maps.Map(document.getElementById('map-canvas'), mapOptions);

		xmlUrl = "inc/markers.xml";

		loadMarkers();

	}

	google.maps.event.addDomListener(window, 'load', initialise);
There’s just two lines here that aren’t standard, the setting of the xmlUrl variable and calling the loadMarkers method. These are both used in the second file, map.js, which is included at the top of index.html. This script handles the importing of the XML. I won’t copy the whole source here, but I will go through the important bits. Firstly, the loadMarkers function:
function loadMarkers() {
	map.markers = map.markers || []
	downloadUrl(xmlUrl, function(data) {
		var xml = data.responseXML;
		markers = xml.documentElement.getElementsByTagName("marker");
		for (var i = 0; i < markers.length; i++) {
			var name = markers[i].getAttribute("name");
			var marker_image = markers[i].getAttribute('markerimage');
			var id = markers[i].getAttribute("id");
			var address = markers[i].getAttribute("address1")+"<br />"+markers[i].getAttribute("address2")+"<br />"+markers[i].getAttribute("address3")+"<br />"+markers[i].getAttribute("postcode");
			var image = {
			  url: marker_image,
			  size: new google.maps.Size(71, 132),
			  origin: new google.maps.Point(0, 0),
			  scaledSize: new google.maps.Size(71, 132)
			};
			var point = new google.maps.LatLng(
				parseFloat(markers[i].getAttribute("lat")),
				parseFloat(markers[i].getAttribute("lng")));
			var html = "<div class='infowindow'><b>" + name + "</b> <br/>" + address+'<br/></div>';
			var marker = new google.maps.Marker({
			  map: map,
			  position: point,
			  icon: image,
			  title: name
			});
			map.markers.push(marker);
			bindInfoWindow(marker, map, infoWindow, html);
		}
	});
}
The important part here is the calling of the downloadUrl function, which passes through the xmlUrl we set earlier and returns an XML object that we can loop through to create our markers. In the interest of my own sanity I’m not going to step through this line by line, but you’ll see that the markers variable is set from the xml variable, which is then looped through using a for loop. All of the variables I set from there on are specific to the information I’m showing. Then we’re simply creating a marker var, setting its properties, and then pushing that into the map.markers object.
The downloadUrl function is short and sweet:
function downloadUrl(url,callback) {
	var request = window.ActiveXObject ?
		 new ActiveXObject('Microsoft.XMLHTTP') :
		 new XMLHttpRequest;

	request.onreadystatechange = function() {
		if (request.readyState == 4) {
			//request.onreadystatechange = doNothing;
			callback(request, request.status);
		}
	};

	request.open('GET', url, true);
	request.send(null);
}
Here, we’re taking a supplied URL and creating a request object. The object type differs depending on what kind of browser the user is in, but the end result is the same. Once that request object is ready, i.e. its been loaded, then we call the callback function and pass through the data. This is then picked up back within our downloadUrl function.
The final file is the xml file itself. This is incredibly simple:
<?xml version="1.0" encoding="UTF-8"?>
<markers>
	<marker id="1" name="Arsenal" markerimage="images/arsenal.png" address1="Emirates Stadium" address2="Highbury House" address3="75 Drayton Park" city="London" postcode="N5 1BU" lat="51.5560928" lng="-0.1053014" />
	<marker id="2" name="Aston Villa" markerimage="images/astonvilla.png" address1="Villa Park" address2="" address3="" city="" postcode="B6 6HE" lat="52.5087462" lng="-1.8854229" />
	<marker id="3" name="Cardiff City" markerimage="images/cardiff.png" address1="Cardiff City Stadium" address2="Leckwith Road" address3="Leckwith" city="Cardiff" postcode="CF11 8AZ" lat="51.4725065" lng="-3.2047995" />
	<marker id="4" name="Chelsea FC" markerimage="images/chelsea.png" address1="Stamford Bridge" address2="Fulham Road" address3="" city="London" postcode="SW6 1HS" lat="51.4807263" lng="-0.1906128" />
	<marker id="5" name="Crystal Palace" markerimage="images/crystalpalace.png" address1="Selhurst Park Stadium" address2="Whitehorse Lane" address3="" city="London" postcode="SE25 6PU" lat="51.3977037" lng="-0.0854231" />
</markers>
You’ll see there is a parent markers node, with child marker nodes that contain the information needed for the markers within their attributes.
If you have any questions or comments, feel free to post them in the comments below and I’ll do what I can to help you out!