When developing websites with WordPress, an often overlooked feature is the built-in function that allows developers to create their own custom Featured Image sizes. In this tutorial and supporting video, I’m going to explain why and how you can use custom Featured Image sizes.
WordPress themes that support Featured Image allow authors to upload and specify a ‘featured image’ to accompany their post. However I see countless WordPress sites whereby featured images are not shown at their true native size and are simply scaled through CSS. Displaying the image at a different size can often look distorted and take longer to load than necessary. In the video tutorial below, I’ll show you a few examples of what I mean by this and also how easy it is to not only set the base Featured Image size, but to create and use as many sizes as you like for the different usage that you might need around your site.
How to set the base Post Thumbnail Size
Like I demonstrate in the video, setting your Post Thumbnail size is incredibly easy via your theme’s functions file. Simply add and customise one of the two lines below:
set_post_thumbnail_size( 60, 60 ); // Creates a proportionate image 60px by 60px

set_post_thumbnail_size( 60, 60, true ); // Creates a cropped image 60px by 60px
And if your theme doesn’t already bring out the thumbnail, you can simply use the following code within the query Posts Loop:
<?php the_post_thumbnail(); ?>
How to create additional custom Featured Image sizes
If you’re post’s featured image is going to appear at different sizes throughout the site, then you can register, generate and deploy as many different sizes as you wish. New custom sizes can be registered by adding them to your functions file in a similar way to setting the default Featured Image size above.
add_image_size( 'small-featured', 300 ); // Creates a proportionate new image 300px wide with unlimited height

add_image_size( 'small-cropped', 200, 200, true ); // Creates a cropped new image 200px by 200px high
Once you’ve set your new sizes on the theme’s functions.php file, you can then call them out on the front-end by using referencing them in either of the following ways:
<?php the_post_thumbnail( 'small-featured' ); ?>

<?php the_post_thumbnail( 'small-cropped', array('class' => 'classname')); // to add a class to the img tag ?>
How to generate the new Featured Image size for existing images.
All this can sound great, but there is one small hurdle if you’re hoping to add a new Featured Image size onto an existing and established WordPress site. Once you create the new custom Featured Image size on your functions file, WordPress won’t automatically regenerate your existing media library images for the new size. It’s fine from then-on-in, any new image you upload will be generated at the new size, but it won’t automatically go through your previously uploaded images and do the same.
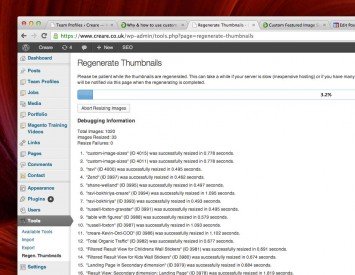
However help is at hand. Regenerate Thumbnails for WordPress is a free plugin designed to specifically overcome this problem. From the Tools tab in the sidebar, you can choose to regenerate all thumbnails and images within your Media Library (see opposite). Or you can navigate to the Media Library itself and regenerate individual or selections of images that you require at the new sizes.
So why bother?
Displaying various featured images at an exact, native size can seem like an unnoticeable and unnecessary task. However, when you consider that they will be crisp, undistorted, optimal file size and tailored to your design; it really is worth spending an extra few minutes setting up and deploying custom featured image sizes.